Modern security relies on constant, reliable monitoring. When a surveillance device stops working, it creates a vulnerable gap in protection. For homeowners and business operators in Singapore, this is a serious concern.
Functional systems are crucial for deterring crime and providing evidence. The global rise in their use, with over 1.54 million units in India’s top cities alone, shows this trend. A malfunction can lead to significant security loss.
This guide explains that many common problems have solutions. From power supply hiccups to network glitches, a range of issues can be fixed. You can often restore your coverage with some DIY troubleshooting or professional assistance.
Understanding your options saves both time and money. We will cover how to identify problems, perform basic repairs, and know when to call an expert. Timely action restores your peace of mind and prevents prolonged risk.
Whether you have a wired or wireless setup, this information is valuable. Assessing your specific situation helps you decide between a fix and a replacement. A well-maintained surveillance system offers long-term reliability for your property.
Key Takeaways
- Many common surveillance system malfunctions are repairable through DIY methods or professional services.
- A broken security device creates a direct vulnerability for both homes and businesses.
- Timely repair is essential to restore full monitoring coverage and prevent security loss.
- Common fixable issues include power failures, network problems, and software glitches.
- Assessing the specific problem is the first step before deciding on repair or replacement.
- Proper maintenance extends the life and reliability of your entire security setup.
- Understanding basic troubleshooting can save significant time and money.
Understanding CCTV Repair: When It’s Possible and Practical
A faulty surveillance unit doesn’t always mean a trip to the electronics store. Many common problems have simple, cost-effective solutions. Understanding when a fix is feasible protects your investment and keeps your property secure.
Numerous glitches are repairable without expert help. These include power supply failures, loose wire connections, and outdated firmware. Software updates or reseating a cable can often restore full functionality.
Several factors determine if a fix is practical. Consider the age of the hardware, the extent of physical damage, and the availability of spare parts. An older model with obsolete technology might justify replacement.
Cost is a major deciding point. Weigh the price of a professional repair against a new system plus installation. For minor issues, fixing your current setup is almost always cheaper.
Timely intervention prevents total system failure and footage loss. Addressing a small problem quickly can add years to your surveillance network’s life.
Some situations demand a professional assessment. Complex integrations, warranty-covered devices, or suspected internal water damage are examples. An expert can provide a definitive diagnosis.
“A practical approach to maintenance avoids unnecessary expenditure and maintains continuous security coverage.”
Always start with basic diagnostics. Check power sources and network connections before assuming the worst. For residents and business owners in Singapore, accessing reliable local repair services can make restoration the smartest choice.
In the end, a methodical evaluation saves both time and money. Knowing when repair is possible ensures your monitoring remains active without a significant financial hit.
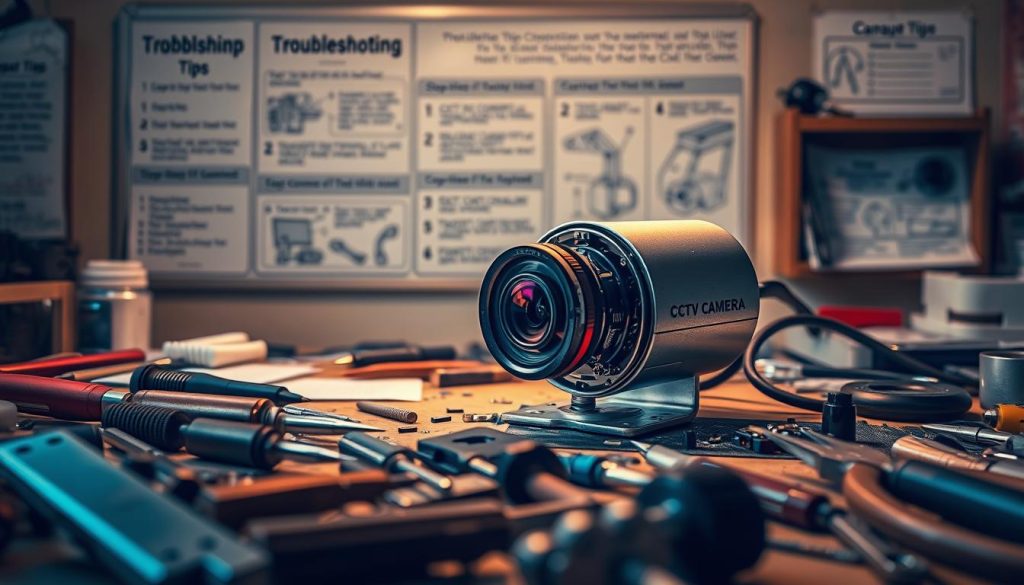
Common CCTV Camera Problems You Can Often Fix Yourself
A sudden loss of video feed or a blurry image often signals a simple problem. Numerous malfunctions have straightforward solutions that require minimal technical skill. Understanding these common failures is the first step toward a quick restoration.
Regular checks can prevent small glitches from becoming major headaches. The following sections detail frequent issues you can likely resolve on your own.
Power and Electrical Issues
Many units fail due to basic electrical problems. A loose power cord or a faulty adapter is a typical culprit.
Check all physical connections first. Ensure the power cable is securely plugged into both the device and the outlet. For wireless models with a battery, verify it holds a charge.
Using a multimeter to test the output from your power supply is a smart diagnostic step. This can confirm if the adapter provides the correct voltage. Replacing a bad adapter often solves the problem completely.
Video Signal and Connection Loss
Intermittent or lost video is frustrating. For wired systems, inspect the coaxial or Ethernet cable for kinks or damage. Loose BNC connectors are a frequent source of signal loss.
Wi-Fi-based surveillance devices suffer from network instability. Ensure your router is functioning and the camera is within range. Reducing interference from other electronic devices can strengthen the connection.
Reseating cables at both the camera and recorder ends can restore a stable feed instantly.
Poor Image Quality and Focus Problems
Blurry or distorted footage reduces a system’s effectiveness. A dirty lens is the most common cause. Gently clean the glass with a soft, microfiber cloth.
Sometimes the focus mechanism is misaligned. Many models allow for manual focus adjustment via a small ring on the lens housing. Also, check for obstructions like spider webs or overgrown plants in the field of view.
Correcting these physical issues usually delivers a clear, sharp picture again.
Night Vision and Infrared Failure
When low-light performance fails, your property becomes vulnerable after dark. Malfunctioning IR LEDs are a typical hardware issue. You might see a faint glow or no glow at all from the camera’s infrared array.
A dirty infrared cut filter over the sensor can also block night vision. Carefully clean the exterior casing. Excessive ambient light from a streetlamp can sometimes confuse the system, causing it to not switch to night mode.
Diagnosing the specific cause helps you decide on the next step.
Software, Firmware, and Motion Detection Glitches
Your surveillance hardware relies on software to function. Outdated firmware can lead to freezing, crashes, or lost features. Check the manufacturer’s website for updates.
Motion detection that is too sensitive or not sensitive enough is a settings issue. Access the system’s menu to recalibrate the detection zones and sensitivity levels. A full system reboot can clear temporary software errors.
“Most performance hiccups stem from correctable settings or minor physical faults, not catastrophic failure.”
Identifying the root cause of any malfunction is the crucial first move. With basic tools and a methodical approach, you can solve many common problems and avoid unnecessary service calls. This maintains your home or business security without significant cost or downtime.
A Step-by-Step Guide to Diagnosing and Repairing Your CCTV Camera
A systematic approach to diagnostics often reveals simple fixes for seemingly complex failures. Following a logical sequence helps isolate the exact cause of your monitoring issue. This guide outlines five critical steps to restore your property’s security coverage.
Each phase builds upon the last, from basic checks to advanced software updates. Adhering to this method saves time and prevents unnecessary component replacement. Let’s begin the restoration process.

Step 1: The Essential Preliminary Checks
Always start with the simplest solutions. Power cycle your entire surveillance setup by turning off the recording device and the camera. Wait sixty seconds before restarting them.
This basic reboot clears temporary software glitches and resets the system. Verify the power outlet is functional by plugging in another appliance. Ensure all devices, including the DVR or NVR, are securely plugged in and receiving power.
Check for any indicator lights on the camera and recorder. Their status provides immediate clues. If your model uses a battery, confirm it is charged and properly seated.
Using built-in diagnostic tools can quickly identify basic network or storage issues. Many modern systems have a health check menu. Consult your user manual for its location.
Step 2: Inspecting Cables, Connections, and Power Supply
Physical connections are a common failure point. Visually inspect every cable, including coaxial, Ethernet, and power lines. Look for fraying, kinks, or chew marks from pests.
Ensure each connector is tight and secure at both ends. A loose BNC or RJ45 plug can cause complete video signal loss. Gently reseat each one to guarantee a proper connection.
Test your power supply with a multimeter if you have one. Compare the output voltage to the specification on the adapter. An incorrect power supply can damage the unit.
Replace any damaged cables immediately. Use the correct type and length for your specific installation. Proper cable management prevents future stress and signal degradation.
Step 3: Cleaning the Camera and Lens
Image quality suffers when the lens is dirty. Use a soft, dry microfiber cloth to gently wipe the glass. Avoid abrasive materials or harsh chemicals that could scratch the surface.
Clean the housing and the infrared LED array around the lens. Dust and spider webs here can severely impair night vision performance. A small brush can dislodge debris from crevices.
Handle the device carefully to avoid static discharge, especially when touching internal components. If you must open the housing, ground yourself first. This protects sensitive electronics.
A clear lens and housing often restore a sharp, unobstructed view. Make this a part of your regular maintenance routine.
Step 4: Accessing and Resetting System Settings
Incorrect configurations cause many operational issues. Access your device’s menu via a connected monitor or software interface on a computer. Navigate to the system settings section.
Look for options to adjust image parameters like brightness, contrast, and resolution. Reconfigure motion detection zones and sensitivity if alerts are faulty. Corrupted settings often require a factory reset.
Select the ‘Restore Defaults’ option to clear any erroneous configurations. You will need to reconfigure basic preferences afterward. This step can resolve unexplained video loss or storage errors.
Always follow the manufacturer’s specific guidelines when adjusting settings. This prevents voiding warranties and ensures compatibility.
Step 5: Updating Firmware and Software
Outdated software is a leading cause of instability and security flaws. Visit the manufacturer’s official website to check for the latest firmware for your model. Download only the correct file for your hardware version.
Follow the provided instructions to install the update through your camera’s interface or a computer. The process often involves uploading a file and waiting for a reboot. Do not power off the unit during this critical install.
This update can resolve performance glitches, add new features, and patch vulnerabilities. Regular updates are crucial for long-term network security and reliability.
Completing these five steps methodically resolves the majority of common surveillance problems. You restore functionality without significant cost or downtime. Consistent, careful troubleshooting maintains your property’s protective oversight.
When to Call a Professional CCTV Technician in Singapore
Certain technical failures demand specialized skills and tools beyond basic homeowner knowledge. Attempting a complex fix yourself can void warranties or cause further damage.
Recognizing these situations protects your investment and restores your property’s oversight quickly.
Internal hardware damage is a clear sign to call an expert. This includes a cracked image sensor, burnt circuit boards, or severe water ingress. These components require precise soldering and genuine replacements.
Extensive wiring faults in walls or conduits also need professional attention. So do advanced network configuration issues for IP-based surveillance systems.
High-risk installations present another scenario. If your devices are mounted in very high or difficult-to-reach locations, a technician has the safety gear. The same applies for units integrated with sophisticated alarm or access control systems.
Intermittent problems that persist after your troubleshooting indicate a deeper fault. A professional assessment can pinpoint the root cause, whether in the camera, recorder, or network.
Hiring a certified technician in Singapore offers distinct advantages. They understand local regulations and building codes. These experts also have access to diagnostic tools the average person does not.
Most importantly, using an authorized service provider preserves your equipment’s warranty. They ensure any repair uses authentic parts, guaranteeing compatibility and longevity.
Selecting a reliable professional requires some research. Always check their credentials and certifications. Look for online reviews and ask for a clear service guarantee.
Reputable dealers, like those found locally, offer expert services and genuine components. This is crucial for maintaining video quality and overall system integrity.
“A qualified technician provides not just a repair, but a diagnosis that prevents future security loss.”
Professional services are often cost-effective for major repairs. They prevent the expensive mistakes that can come from incorrect DIY attempts. This saves money on potential replacement costs for your entire setup.
The time factor is also critical. An experienced pro can diagnose and resolve issues rapidly. This minimizes security downtime for your home or business.
Always obtain and compare quotes from a few providers before committing. This ensures you get fair value for the required service.
In the end, professional intervention ensures the long-term reliability and optimal performance of your surveillance network. It is a smart choice for complex issues, securing your peace of mind.
Maintaining Your CCTV System for Long-Term Reliability
Ensuring your monitoring hardware operates for years requires a consistent maintenance routine. A proactive schedule prevents common failures and extends the lifespan of your entire security setup.
Regularly clean each camera lens and housing with a soft cloth. This maintains clear video quality and prevents dirt accumulation. Check all cables and power connections every few months for wear.
Updating firmware is crucial for security and performance. These patches fix vulnerabilities and improve stability. Also, verify your motion detection and night vision settings during checks.
Optimal placement protects units from Singapore’s rain and direct sun. Use waterproof housings outdoors. Ensure an unobstructed view for effective monitoring.
Manage your storage by monitoring DVR hard drive health. Replace drives as needed to prevent video loss. Test recording functions periodically to confirm the system captures information.
Keeping a simple log tracks inspections and updates. This disciplined approach is your best defense against unexpected downtime. Consistent care maximizes surveillance performance and minimizes future repair needs.