A reliable surveillance system forms the backbone of protection for properties in Singapore. When a CCTV camera stops working, it leaves a blind spot that criminals could exploit. This gap in coverage is a serious security risk for any home or business.
Our comprehensive guide empowers you to diagnose and resolve frequent problems yourself. We provide a logical, step-by-step approach to troubleshooting. You will learn how to address everything from a total power loss to grainy or unclear video footage.
Acting quickly on these issues is crucial. Timely fixes restore your security and can prevent more expensive repairs later. Many malfunctions have straightforward solutions you can perform.
Surveillance equipment in Singapore faces harsh conditions like dust, humidity, and heat. These factors can accelerate wear. This resource prepares you to maintain your system effectively.
The following sections break down specific common problems with common cctv setups. You’ll gain the confidence to get your cameras back online and your property secure.
Key Takeaways
- Functional CCTV systems are critical for complete security coverage in Singaporean homes and businesses.
- A single faulty camera creates a security vulnerability that needs immediate attention.
- This guide provides a systematic method to diagnose and fix a wide range of surveillance issues.
- Topics covered include power failures, connectivity problems, and image quality concerns.
- Proactive troubleshooting saves money by avoiding major repairs or full system replacements.
- Many CCTV malfunctions have logical, do-it-yourself solutions.
- Environmental stress from heat and dust can shorten camera lifespan, making maintenance key.
Why Proactive CCTV Troubleshooting is Essential for Security
Waiting for a camera to fail before taking action leaves your property exposed to unnecessary risk. A well-maintained CCTV system is your first line of defence, but it requires constant vigilance.
Reactive fixes after a break-in are simply too late. Proactive maintenance ensures continuous protection and keeps your surveillance operational around the clock.
Regular checks catch minor issues early. A loose cable or a dusty lens can escalate into a total blackout if ignored.
These simple inspections prevent major system failures. They save you time and money in the long run.
An ounce of prevention is worth a pound of cure, especially when it comes to property security.
System reliability isn’t just about convenience. In Singapore, operational surveillance may be required to comply with local regulations or insurance standards.
A non-functional setup could lead to legal or financial penalties. Keeping your cameras working is a matter of responsibility.
The cost of preventative care is always lower than the potential loss from a breach. Think about stolen assets or vandalism during recording downtime.
Investing in routine checks is a smart financial decision. It protects your physical and digital assets.
Singapore’s climate poses unique challenges. High humidity and occasional haze can accelerate wear on CCTV components.
Proactive maintenance counteracts these environmental stresses. It extends the lifespan of your equipment significantly.
A functional system does more than deter criminals. It provides vital footage as evidence should an incident occur.
This evidential role makes reliability non-negotiable. You cannot afford gaps in your security coverage.
Adopting a proactive mindset means understanding typical failure points. This guide details those common problem areas in the following sections.
You’ll learn practical solutions for everything from power loss to poor image quality.
Ultimately, investing time to learn troubleshooting is an investment in long-term peace of mind. It secures your property and protects your people.
Start with regular visual inspections and simple tests. This proactive habit is your best defence against unexpected camera failures.
What is the Common Problem of CCTV Camera? An Overview
From a complete black screen to a grainy picture, CCTV issues generally fall into a few key categories. Understanding these patterns is the first step toward a quick fix.
Most malfunctions can be grouped into five areas: power, connectivity, image clarity, performance, and special functions.
Power-Related failures are a top concern. Your surveillance device may not turn on at all. This often points to a faulty adapter, damaged cables, or a tripped circuit.
Without stable electricity, the entire unit is useless. Checking the power source is always the first diagnostic step.
Connectivity and signal loss is another frequent headache. You might see a “no video feed” message on your monitor.
For wired systems, this suggests broken cables or loose connectors. Wireless or IP cctv cameras suffer from weak Wi-Fi or network misconfiguration.
Image Quality degradation is a very common problem. Footage appears blurry, distorted, or has incorrect colors.
A dirty lens is often the simple culprit. Incorrect camera settings or focus misalignment also ruin picture quality.
Performance issues like freezing, lagging, or flickering disrupt live viewing. They strain both analog and digital setups.
These problems usually stem from bandwidth limits, outdated hardware, or unstable power voltage.
Finally, functional failures affect specific features. Night vision might not activate, leaving dark areas unmonitored.
Recording can stop due to full storage or a failing hard drive. Motion detection may become unreliable.
Encountering one of these common cctv troubles is a normal part of system ownership. It doesn’t automatically mean you bought inferior equipment.
Symptoms can differ between older analog and modern IP-based cctv cameras. Yet, the root causes for these issues frequently overlap.
Environmental factors in Singapore play a huge role. Humidity, dust, and heat accelerate wear on components.
Installation quality is equally critical. Poorly secured cables or suboptimal camera placement invite common problems.
Now that you can identify the major trouble categories, a detailed repair roadmap follows. The next sections provide step-by-step diagnostics for each major problem area.
You’ll learn practical solutions to restore your camera to full operation and maintain your property’s security.
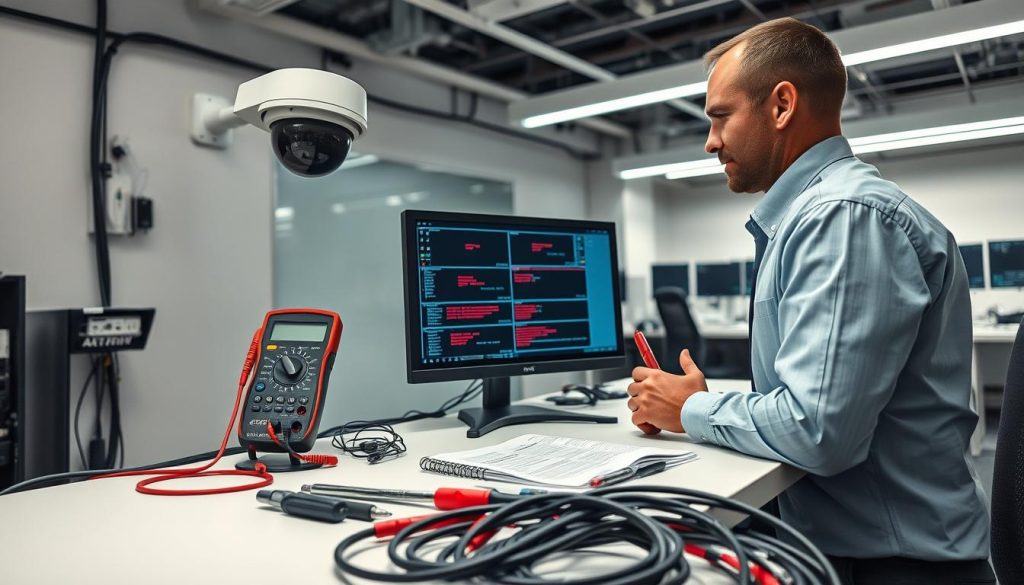
Camera Not Powering On: Diagnosing Power Issues
Power failures are the leading cause of CCTV malfunctions, halting all monitoring functions. A unit that won’t turn on creates an instant security gap. Systematic diagnosis of the electrical pathway is your first and most critical step.
Begin with the simplest checks before assuming major damage. This logical approach saves time and often reveals an easy fix. Follow this guide to restore your camera to operation.
Power Supply and Adapter Failures
Your camera needs stable electricity. Start by verifying the wall outlet is live. Plug in a lamp or phone charger to test it. If the outlet is dead, check your home’s circuit breaker.
A faulty power supply or adapter is a frequent culprit. Inspect the unit for physical signs of failure. Look for burn marks, a swollen casing, or a frayed cord. These are clear indicators of a defective component.
For a more precise test, use a multimeter on the adapter’s output. No voltage reading confirms the supply has failed. Using cheap, uncertified adapters invites this problem. They often overheat and break under load.
Always use manufacturer-recommended or high-quality Switched-Mode Power Supplies (SMPS). Certified power products protect against voltage fluctuations common in some areas. This investment safeguards your entire surveillance system.
Faulty Cables and Loose Connections
Even with a good power supply, electricity must reach the camera. Inspect all cables thoroughly. Look for cuts, severe fraying, or corrosion, especially at connection points.
Check both ends of the cable—at the camera housing and the power source. Ensure connectors like DC jacks are firmly seated. A loose connection can mimic a total power loss.
Singapore’s climate accelerates wear. Heat and humidity degrade cable insulation over time. Moisture can cause corrosion inside connectors, breaking the circuit. Plan periodic inspections every few months.
Isolate the faulty component by testing with known-working parts. Swap the adapter or cable from a functioning camera. If the unit powers on, you’ve found the defective part.
If all external power sources and cables check out, internal circuitry may be damaged. A power surge could have fried the camera‘s board. At this point, seeking professional repair is the safest course to restore your security.
No Video Signal or Complete Feed Loss
When your CCTV camera has power but transmits no picture, the issue lies within the video pathway. This frustrating scenario leaves a critical gap in your surveillance coverage.
Diagnosis splits into two clear paths. For all cameras, inspect the physical connection. For modern IP-based units, you must also investigate the network.
A logical, step-by-step approach will isolate the fault. Start with the simplest physical checks before diving into complex network configurations.
Checking Physical Cables and Connectors
Physical links are the most frequent source of total signal loss. Begin with a thorough visual and tactile inspection of all transmission lines.
For analog setups, examine the coaxial cable and its BNC connector. Ensure it is screwed on tightly at both the camera and DVR end. Look for bent pins or signs of corrosion.
IP cameras use Ethernet cables. Check that the RJ45 plug clicks firmly into the port. Inspect the cable jacket for cuts, kinks, or chew marks from pests.
Singapore’s humid climate accelerates connector corrosion and cable degradation. Perform this inspection every three months as part of routine maintenance.
Cable quality and length are critical. Long runs without proper boosters cause signal attenuation. This weakness can result in a complete feed dropout.
- Use certified, outdoor-rated cables with solid copper conductors for durability.
- Verify the cable run is within the manufacturer’s specified distance limit.
- Check for physical damage along the entire route, especially at stress points.
If a connection seems loose or corroded, reseat it firmly. Try swapping with a known-working cable from another camera. If the video returns, you’ve found the faulty component.
Network and Configuration Issues for IP Cameras
If physical cables are intact, the problem often resides in network settings or hardware. IP cameras rely on correct digital connectivity to transmit their video stream.
First, reboot the entire chain. Power cycle the camera, your NVR, and the network switch or router. This simple step can clear temporary glitches blocking the data stream.
Next, verify the camera is accessible on your network. Use your manufacturer’s device finder tool or a network scanning app. You can also open a command prompt and “ping” the camera‘s IP address.
A failed ping indicates a network configuration conflict. Check the camera‘s IP address, subnet mask, and default gateway settings. Ensure they match your local network and do not conflict with another device.
Examine your network hardware. Try plugging the camera into a different port on your switch. Ensure the port is not disabled and is on the correct VLAN if your system uses segmentation.
Bandwidth congestion can also choke a video feed. If multiple high-resolution streams are active, your network switch or router may be overloaded.
For critical surveillance, consider a dedicated network switch for your CCTV system to ensure consistent bandwidth and isolate traffic.
If all network diagnostics pass but the camera remains invisible, the internal sensor or board may have failed. At this point, professional assessment or replacement is the most reliable solution to restore your security footage.
Fixing Poor Image Quality and Focus Problems
Blurry footage and distorted colors can severely compromise the effectiveness of your surveillance system. Poor image quality manifests as a lack of sharpness, incorrect hues, or washed-out video.
These issues prevent clear identification of people and objects. Fortunately, most causes have straightforward solutions you can apply yourself.
Three primary areas typically need attention. Start with the physical lens, then check electronic settings, and finally correct color balance.
Cleaning the Lens and Removing Obstructions
A dirty lens is the most frequent cause of blurry footage. Dust, pollen, and urban grime accumulate on the glass surface. This layer scatters light, drastically reducing image clarity.
Use a soft, lint-free microfiber cloth for cleaning. Gently wipe the lens in a circular motion from the center outward. For stubborn spots, lightly breathe on the glass to create mild moisture first.
Avoid using paper towels, shirt sleeves, or any abrasive material. These can scratch the delicate lens coating. Permanent scratches will forever degrade video quality.
In Singapore’s dusty and humid environment, monthly lens cleaning is critical. It is a simple yet powerful preventative maintenance task. Always check for spider webs or leaves that might block the field of view.
Adjusting Camera Settings and Focus
If the lens is clean but images remain soft, internal settings likely need tuning. Access your camera‘s configuration menu via its On-Screen Display (OSD) or web interface.
First, verify the focus. Many cameras offer manual or autofocus controls. For a permanent installation, manual focus often provides the most stable result. Adjust it while viewing a live feed until distant details appear sharp.
Next, fine-tune picture parameters like sharpness, contrast, and brightness. Increase sharpness slightly to enhance edge definition. Boost contrast to separate objects from the background.
Be cautious with over-sharpening. Excessive levels introduce digital noise and artifacts, making the image look grainy and unnatural.
Ensure your camera is set to its native resolution and an appropriate frame rate. Lower resolutions save bandwidth but sacrifice detail. For general surveillance, 15-20 frames per second usually provides smooth performance.
Addressing Incorrect White Balance and Colour Distortion
Inaccurate colors make identification difficult. White walls may appear blue or yellow. This problem stems from incorrect white balance settings.
Most CCTV units use Auto White Balance (AWB) or Auto Tracking White Balance (ATW). These systems can fail under mixed lighting conditions, like a room with both fluorescent bulbs and daylight.
For outdoor cameras using AWB, angle them away from the bright sky. The large blue expanse can trick the sensor. Manually setting the white balance delivers more consistent color.
Disable the auto feature in your camera‘s menu. Then, select a preset matching your primary light source: Daylight, Cloudy, Fluorescent, or Incandescent. Some advanced models allow manual hue or gamma correction.
Set realistic expectations for color vision. Many surveillance cameras have a limited color range. They may not reproduce perfect tones under all lighting scenarios. The goal is accurate enough for reliable identification.
Regularly review your image quality during different times of day. Proactive adjustments ensure your cameras capture usable evidence around the clock.
Resolving Night Vision and Low-Light Performance Issues
Infrared technology allows cameras to capture clear footage even in total darkness. When this system fails, your property’s after-hours security is compromised.
Poor night vision often stems from hardware malfunctions or environmental interference. Addressing these issues restores your round-the-clock monitoring capability.
Two main areas require your attention. First, inspect the camera’s internal infrared components. Second, evaluate and adjust its physical placement and ambient light conditions.
Checking IR LEDs and Infrared Functionality
Most CCTV night vision relies on built-in infrared LEDs and a smart filter. An IR-cut filter switches based on ambient light levels, allowing color video by day and infrared-sensitive monochrome by night.
Start diagnostics by checking if the IR LEDs activate. In a dark room, look for a faint red glow around the lens. No glow suggests the LEDs have failed or aren’t receiving power.
Use another functioning camera’s night vision mode to check. Point it at the suspect unit. If the faulty camera’s LEDs appear bright in the feed, they are working. This cross-check confirms the performance of the infrared array.
A stuck IR-cut filter is another frequent culprit. This mechanical part can fail, causing a persistent reddish tint in daytime footage.
At night, a stuck filter blocks infrared light, resulting in extremely dark or black images. This fault typically requires professional repair to replace the filter mechanism.
Managing Ambient Light and Camera Placement
External light sources can confuse a camera’s light sensor. Position units away from direct glare from street lamps or building lights.
These bright sources can prevent the automatic switch to night vision mode. The camera stays in color mode, producing a dark, grainy picture.
Access your camera’s settings menu. Look for a “Night Mode” or “IR Control” section. You can often adjust the sensitivity threshold for switching.
Increasing the switch threshold delays the change to infrared until it is truly dark, preventing false triggers from stray artificial light.
Reflective surfaces within the field of view cause “IR bounce-back.” White walls, glass, or shiny objects reflect the camera’s own infrared beam.
This creates a washed-out, overexposed spot in the image. Reposition the camera to avoid these surfaces for better quality low-light performance.
For large or very dark areas, built-in LEDs may be insufficient. Consider adding external IR illuminators.
These standalone units project infrared light over a longer range. They boost coverage without overloading your camera’s internal components.
Singapore’s heat can degrade IR LED output over years. Prolonged exposure to high temperatures slowly reduces their intensity and range.
Regularly testing night vision performance helps catch this gradual decline. It ensures your CCTV system remains effective through every dark night.
Stopping Intermittent Connectivity and Signal Problems
Intermittent signal loss is a nagging issue that disrupts continuous video surveillance. This problem involves cameras randomly dropping offline or feeds freezing and resuming.
Such unstable performance creates blind spots exactly when you need reliable monitoring. It erodes trust in your entire security setup.
Diagnosing these flickering connection issues requires a two-pronged approach. You must evaluate both your wireless network and local electrical environment.
Persistent connectivity drops often stem from weak Wi-Fi or bandwidth overload. Electrical noise from appliances can also corrupt the data signal.
Addressing both areas restores stable video transmission. Your system will deliver consistent, real-time footage for peace of mind.
Wi-Fi Strength and Network Bandwidth
Wireless CCTV setups depend entirely on a robust network. A weak Wi-Fi signal at the camera’s location is a primary cause of dropouts.
Use a smartphone app to measure signal strength. Stand near your camera and check the readings. Anything below -70 dBm is considered poor and prone to issues.
Physical obstructions like thick walls or metal surfaces block Wi-Fi waves. Reposition your router or consider a Wi-Fi range extender to boost coverage.
For larger properties, a mesh network provides seamless coverage. Powerline network adapters offer another stable alternative by using your home’s electrical wiring.
Bandwidth congestion is another critical factor. Each camera stream consumes data, especially at high resolution.
Calculate total consumption for all your cameras. Ensure your router and internet plan can handle the load, particularly for remote viewing.
Upgrading to a modern, dual-band router can segregate traffic. It dedicates one band solely to your CCTV system for smoother performance.
Regularly reboot your router to clear temporary glitches. This simple step can resolve many intermittent connectivity problems over time.
Electrical Interference and Grounding Issues
Electronic devices can introduce noise into power lines, corrupting signals. Motors, fluorescent lights, and high-power appliances are common culprits.
This electrical interference manifests as flickering feeds or sudden disconnections. It affects both wired and wireless CCTV units.
Proper grounding for your entire system is essential. It provides a safe path for stray voltage and reduces noise.
Always use shielded cables for video transmission. The shielding acts as a barrier against electromagnetic interference.
Run power cables and data cables separately. Avoid laying them parallel to each other over long distances.
- Maintain a minimum gap of 6 inches between power and data lines to prevent crosstalk.
- Use conduit or cable trays to organize and physically separate different wire types.
- Inspect all connections for corrosion, as poor contacts can amplify interference.
For the cleanest power, consider a dedicated circuit for your surveillance equipment. An Uninterruptible Power Supply (UPS) offers further protection.
A UPS filters out surges and provides stable voltage. It prevents brownouts from affecting connection quality.
Implementing these solutions creates a robust foundation. Your cameras will maintain a steady link, free from disruptive electrical noise.
Correcting Image Freezing, Lagging, and Flickering
Unstable video feeds that freeze or flicker undermine the trustworthiness of any security monitoring effort. These performance issues disrupt real-time observation and can corrupt recorded footage.
It’s important to distinguish between the three main symptoms. Freezing is a still image. Lagging means a delayed live feed. Flickering involves rapid brightness or line fluctuations.
Each symptom points to different underlying problems. A systematic approach identifies the root cause, whether it’s network strain or electrical instability.
Bandwidth Limitations and Hardware Performance
High-resolution streams from multiple cameras can overwhelm your network. An underpowered NVR or DVR also struggles to process the data.
This congestion causes freezing and lagging. Your system cannot keep up with the incoming video load.
Lowering the bitrate, resolution, or frame rate on your cameras is a useful test. If performance improves, bandwidth is likely the bottleneck.
For a permanent fix, consider upgrading your network infrastructure. A modern gigabit switch provides more data capacity.
An outdated NVR with limited processing power or RAM will choke on today’s high-definition streams. Upgrading the unit restores smooth video quality.
Check your recorder’s hardware specifications. Sufficient RAM and a fast hard drive are critical for handling multiple feeds.
If your CCTV system is several years old, the hardware may simply be obsolete. Newer models offer better processing for modern surveillance demands.
Power Fluctuations and Voltage Stabilizers
Flickering is often a direct symptom of unstable AC power. Voltage sags and surges are common in areas with heavy electrical loads.
These fluctuations corrupt the signal from your cameras. The result is a video feed that jumps or displays horizontal lines.
Installing a dedicated voltage stabilizer conditions the power supply. It smooths out irregularities before they reach your equipment.
For maximum protection, use an Online Uninterruptible Power Supply (UPS). This device filters power and provides backup during outages.
Always verify your camera’s power adapter rating. Using a mismatched voltage or amperage can cause persistent flickering and potential damage.
Ground all electrical equipment properly. Poor grounding introduces noise that manifests as signal interference on the screen.
For optimal connectivity, use a separate circuit for your security system. This isolates it from other household appliances.
- Test with a known-good adapter to rule out a faulty power source.
- Inspect all wiring for loose connections that can cause intermittent flickering.
- Consider professional assessment if flickering continues, as it may indicate a failing image sensor.
Unstable power is a leading cause of premature camera failure. Learn more about protecting your investment in our guide on why security cameras go bad.
Addressing these problems ensures a stable, reliable video feed. Your surveillance system will deliver consistent performance and usable footage when it matters most.
Preventing Recording and Storage Failures
Storage failures silently undermine the entire purpose of your security investment, leaving you with no record of critical events. This nightmare scenario—a break-in with zero usable footage—is often caused by overlooked storage management.
Your cameras and system can be fully operational, yet still fail to capture evidence. Proactive control over your recording setup is non-negotiable for reliable security.

Two critical areas demand your attention. First, ensure your hard drive is healthy and configured correctly. Second, accurately calculate your storage needs and implement robust backup solutions.
Hard Drive Health and Overwrite Settings
A full hard drive stops all recording activity. Access your DVR or NVR’s main menu to verify the settings. Navigate to the storage or recording configuration section.
First, confirm that continuous or motion-triggered recording is active. Then, locate the “auto overwrite” function. This feature must be enabled.
When enabled, the oldest footage is automatically deleted to make space for new video. This ensures your system never stops capturing events due to a full disk.
Next, check the hard drive’s health status within the same interface. Look for S.M.A.R.T. data or status alerts. Warnings about bad sectors or imminent drive failure require immediate action.
Never use standard desktop hard drives in a surveillance system. They are not built for the constant write cycles and vibration from multiple cameras.
Invest in drives engineered for 24/7 operation. Brands like Western Digital Purple or Seagate SkyHawk are designed for this performance demand. They handle temperature fluctuations and constant data writing far better.
Schedule a monthly check of this health status. Catching a failing drive early prevents total footage loss. It is a small investment of time for immense security payoff.
Calculating Storage Needs and Backup Solutions
Running out of space is a predictable problem. Avoid it by calculating your needs upfront. Four main factors determine storage consumption: video resolution, frame rate, compression type, and your required retention period.
Higher resolution and frame rates create larger files. Modern compression like H.265 can cut space usage by 50% compared to older H.264. First, decide how many days of footage you need to keep on hand.
Many CCTV system vendors provide online calculators. Input your number of cameras, their resolution, and desired retention. The tool will recommend a hard drive size.
For a robust strategy, implement multi-tier backup. Your primary recording happens on the NVR/DVR drive. For critical cameras, add a secondary backup.
- Network Attached Storage (NAS): A dedicated NAS device offers large, on-site redundant storage.
- FTP Server Backup: Configure your system to send copies of important clips to a secure FTP server.
- Cloud Backup Solutions: Services automatically upload footage off-site. This preserves evidence even if on-site equipment is damaged or stolen.
Cloud solutions offer excellent protection but consider bandwidth. Uploading high-definition streams requires a stable, fast internet connection. There are also ongoing subscription costs.
Finally, automate your monitoring. Set up email or push notifications for system alerts. Get immediate warnings for “disk full” or “disk error” messages.
This proactive approach transforms storage from a hidden weakness into a pillar of reliability. Your security footage will be there when you need it most.
Ensuring Long-Term Reliability: Maintenance and Professional Help
Long-term reliability in surveillance hinges on a simple formula: regular care and knowing when to call a professional.
Implement a quarterly maintenance routine. Physically inspect all cameras and housings for damage or dirt. Check and tighten every cable connection.
Clean lenses and update device firmware for optimal performance. These tips prevent many common problems before they start.
Proper initial installation is equally vital. Use weatherproof housings outdoors. Avoid pointing camera units directly at bright light sources.
Ensure adequate ventilation to handle Singapore’s humid conditions. Good placement avoids blind spots in your security coverage.
Know when DIY solutions should stop. Seek expert help for complex wiring, internal failures, or recurring issues.
Choose a qualified technician with relevant certifications and local experience. For complete peace of mind, consider an annual professional maintenance contract.
A proactive approach, blending personal vigilance with skilled support, keeps your CCTV systems reliably guarding your property over time.