Enhancing your property’s safety with a do-it-yourself security system is a powerful trend. In Singapore, over half a million CCTV systems are already in operation, highlighting their role in modern home security.
The appeal of a self-managed setup is clear: potential cost savings and direct control. However, this approach requires navigating technical details and important legal guidelines. Non-compliant outdoor cctv installation, for instance, can lead to significant fines.
This guide provides a clear roadmap. It empowers homeowners to plan and execute a successful setup that meets all regulations. A well-planned system deters unwanted activity and offers remote video access for peace of mind. For those who prefer professional help, services from expert security camera installers are also available.
Key Takeaways
- DIY CCTV installation is a popular, cost-effective method to boost home security.
- Over 500,000 such systems are already deployed across Singapore.
- Understanding and complying with local laws, especially for outdoor cameras, is crucial to avoid penalties.
- Proper planning of camera placement for key areas and entry points is the foundation of an effective system.
- This guide offers a step-by-step, compliant process for a successful DIY project.
- A correctly installed system provides deterrence and convenient remote monitoring.
- Rules can differ for HDB flats and private property, so checking specific guidelines is essential.
Understanding Home Security: The Role of CCTV in Singapore
Modern home security in Singapore extends beyond locks and alarms to include intelligent visual monitoring systems. A CCTV system acts as the eyes of your property, providing constant surveillance and critical data.
This technology serves multiple functions, from preventing crime to offering daily convenience. Understanding its core roles helps homeowners make informed decisions about their security needs.
Deterring Crime and Providing Evidence
The visible presence of CCTV cameras is a powerful psychological tool. Potential intruders are less likely to target a home that displays active surveillance.
This deterrent effect is a primary layer of protection. It significantly reduces the risk of burglary or vandalism before an incident occurs.
Should an event happen, recorded footage becomes invaluable. High-quality video provides clear, unambiguous evidence for police reports.
Insurance companies also rely on this visual proof for claims related to theft or property damage. A reliable recording system turns your cameras into silent witnesses.
Monitoring Family and Property Remotely
Beyond crime prevention, these systems offer profound personal benefits. Homeowners gain the ability to check on their property from anywhere.
Using a smartphone app, you can view live feeds or review recordings. This is ideal for watching children, elderly relatives, or domestic helpers.
Remote access provides immense peace of mind in a busy urban environment. You can verify deliveries, monitor pets, or ensure doors are locked while away.
This function transforms security into a tool for daily convenience and family management.
Choosing to install cameras yourself involves weighing key factors. A DIY approach offers potential cost savings and direct control over the setup.
It allows for full customization to cover specific entry points and vulnerable areas. However, it requires comfort with technical tasks and personal responsibility for maintenance.
Professional installation brings expert placement and guaranteed performance. This option often includes warranty support and saves time, but at a higher initial cost.
The right choice depends on your budget, technical confidence, and desired level of hands-on system management.
In Singapore’s dense housing landscape, such as HDB flats, these considerations are crucial. A system’s effectiveness hinges on understanding its role in your unique living situation before moving to the technical setup.
Can I Install CCTV Myself? Navigating Singapore’s Legal Landscape
Embarking on a self-installed security camera project requires more than just tools; it demands a clear understanding of what’s legally permissible. The short answer is yes, you can undertake this installation yourself, but success hinges entirely on location, skill, and strict adherence to local rules.
Ignoring these guidelines can transform a well-intentioned security upgrade into a source of neighborly disputes or even legal penalties. Your first step is not at the hardware store, but in researching the specific regulations for your property type.
DIY Installation: Assessing Your Skills and Confidence
A successful do-it-yourself project begins with an honest self-assessment. Ask yourself if you’re comfortable with basic tasks like drilling into walls, running cables neatly, and configuring network settings via a smartphone app.
Most modern cameras are designed for user-friendly setup. If you can assemble furniture and follow online tutorials, you likely possess the necessary skills. The primary reward is significant cost savings compared to hiring a professional team.
However, consider the complexity of your planned system. A single wireless camera is straightforward. A multi-camera, wired setup covering several entry points is more challenging.
Attempting a complex setup without the right skills or tools often leads to poor placement, unreliable footage, and the need for costly corrections.
If your confidence wavers, seeking professional help for the initial installation ensures optimal performance and compliance from day one.
Indoor vs. Outdoor: Where You Can and Cannot Point Cameras
The legal implications of your project change dramatically based on camera placement. Inside your own home, you generally have broad freedom, provided you respect the privacy of household members.
The critical distinction arises when lenses face beyond your front door. For residents in an HDB flat, a landmark policy change in May 2023 simplified the process for corridor-facing cameras.
Owners no longer need prior HDB approval for such devices. This policy acknowledges the common desire to monitor the semi-public space outside one’s unit.
Privacy protections remain paramount. Your camera must never point directly at a neighbor’s front door, windows, or into their living spaces. This rule is enforced under the Community Disputes Resolution Act.
For any device placed on HDB common property, like a staircase or void deck, Town Council approval is mandatory. The process is strict.
You must submit a formal application, which typically requires a supporting police report to justify the need for surveillance in that common area. Unauthorized installation here can result in fines up to $5,000.
Many homeowners find smart doorbells with video capability to be a less intrusive alternative. When mounted on your own door, they often bypass the need for formal approval while covering the crucial entry point.
Always check your specific town council or condominium management’s latest guidelines before purchasing equipment. Understanding these boundaries is the non-negotiable foundation of a compliant and effective DIY security system.
Legal Compliance for CCTV in HDB Flats, Condos, and Landed Property
The rules governing security camera installations vary significantly between HDB flats, condominiums, and landed properties. Navigating this landscape is crucial for a project that respects both the law and your neighbors’ privacy.
Successful DIY cctv installation hinges on understanding which authority governs your home. Each housing type has distinct processes for approval and specific guidelines to follow.
Ignoring these protocols can lead to disputes, forced removal of equipment, or financial penalties. This guide details the essential compliance steps for every major property category in Singapore.
HDB and Town Council Regulations: Permits and Approvals
For residents in HDB flats, the primary rule is clear. Placing cameras on common property like corridors, lift lobbies, or staircases requires formal Town Council permission.
The application process is strict. You must submit a written request, often accompanied by a supporting police report. This report justifies the need for surveillance in that specific common area.
Approval is typically temporary, granted for up to six months. This means the permission needs periodic renewal, reinforcing the temporary nature of such installations.
Mounting devices on your own front door, facing the corridor, is generally more straightforward. Since May 2023, prior HDB approval for this specific setup is no longer required.
However, your camera must never intrude on a neighbor’s privacy. Pointing it directly at their door or windows remains a violation. Unauthorized setups on common property can result in fines.
Condominium MCST Rules and By-Laws
Condominium living adds another layer of governance. The Management Corporation Strata Title (MCST) sets the rules through its by-laws and handbook.
These documents dictate what alterations you can make to the building’s exterior. External cctv installations almost always require prior written consent from the management.
The process and criteria vary widely between developments. Some MCSTs may have strict duration limits or prohibit certain types of cameras altogether.
Failing to obtain MCST approval can lead to enforcement notices, requiring you to dismantle your system at your own cost.
The safest first step is to meticulously review your condo’s official guidelines. Submit a formal request for permission before purchasing any equipment for external mounting.
Privacy Laws: The PDPA and Community Disputes Resolution Act
Beyond housing-specific rules, overarching privacy laws bind all homeowners. The Personal Data Protection Act (PDPA) primarily regulates organizations.
For personal, non-commercial use, individuals are generally not directly bound. However, its principles of reasonable purpose and notification offer good practice guides for handling footage.
The far more powerful tool for neighbors is the Community Disputes Resolution Act (CDRA). This act protects a person’s right to the “enjoyment of property.”
If your camera causes undue distress or invades a neighbor’s privacy, they can file a claim. Community Disputes Resolution Tribunals have broad powers.
They can order the immediate removal of the cctv system and impose fines of up to $20,000 for substantial interference. This applies even if your setup technically meets housing guidelines.
Landed property owners enjoy the most flexibility for installations within their compound. Yet, they are not exempt from these privacy laws.
Pointing cameras onto public streets or directly into a neighbor’s yard can trigger CDRA claims. The key is to focus coverage on your own entry points and vulnerable areas.
Understanding this legal framework is not optional. It is the foundation for a security upgrade that protects your home without creating legal vulnerability.
Choosing the Right DIY CCTV System for Your Needs
Navigating the marketplace for security cameras involves balancing performance specs with real-world installation factors. This section acts as your buyer’s guide, helping you select a cctv system that matches your home layout, budget, and technical comfort.
The right equipment transforms a legal plan into an effective surveillance network. Your choices directly impact the clarity of footage and the ease of long-term management.
Comparing Wired vs. Wireless CCTV Systems
The first major decision is between wired and wireless cctv systems. Each has distinct advantages for different property types.
Wired systems, often using Power over Ethernet (PoE), deliver power and data through a single cable. This setup provides unwavering reliability and consistent video quality, unaffected by Wi-Fi congestion.
It is ideal for permanent installations with multiple cameras. The initial installation is more involved, requiring cable runs.
Wireless kits offer superior flexibility and a simpler setup process. They connect to your home network, eliminating the need for extensive drilling and cabling.
However, their performance hinges entirely on a strong, stable Wi-Fi signal. Distance from the router and physical obstructions can weaken the connection.
For smaller apartments or rental hdb flats, wireless might be the most practical way forward. For landed homes with more areas to cover, a wired PoE system often proves more robust.
Key Features: Resolution, Night Vision, and Motion Detection
Beyond the connection type, core specifications define what your camera sees. Resolution is paramount for identifying details like faces or license plates.
1080p Full HD is a common standard, but 4K Ultra HD offers four times the detail. Higher resolution requires more storage space but provides critical clarity for footage review.
Effective security operates 24/7. Night vision capability is non-negotiable for outdoor cameras.
Look for the infrared (IR) range, measured in meters, which indicates how far the camera can see in total darkness. Some advanced models offer color night vision for better low-light detail.
Smart motion detection filters out false alarms from swaying plants or pets. Adjustable sensitivity zones allow you to focus on specific entry points like gates or doors.
This feature saves storage space and ensures you only get alerts for relevant activity.
Understanding DVRs, NVRs, and Storage Options
The recorder is the brain of your cctv system, handling all recording and playback. Digital Video Recorders (DVRs) work with older analog cameras.
Network Video Recorders (NVRs) are designed for modern IP cctv cameras. They connect via your network and generally support higher-resolution video.
Ensure compliance between your cameras and recorder type. Mismatched components will not function.
Storage capacity depends on image quality, frame rate, and how long you need to retain recordings. A basic rule: higher resolution and more cameras demand larger hard drives.
For most home needs, a 1TB or 2TB drive offers a good balance, providing several days to weeks of continuous recording.
Match camera types to their locations for optimal performance. Discreet dome cctv cameras are perfect for indoor hallways.
Rugged bullet cameras, with weatherproof ratings, are built for exterior walls and gates. For monitoring large, open area, a PTZ (Pan-Tilt-Zoom) model offers remote directional control.
Always verify system compatibility. The cameras, recorder, cables, and mobile app must work seamlessly together from one brand or ecosystem.
Consider future expansion. Choosing a cctv system that allows you to add more cameras later accommodates growing security needs.
Practical advice for Singapore’s climate: invest in proper weatherproofing for outdoor units and reliable night vision. This ensures long-term performance despite humidity and heavy rain.
Balancing cost with these key features creates a cctv installation that delivers peace of mind for years. Following these guidelines helps owners make confident purchasing decisions.
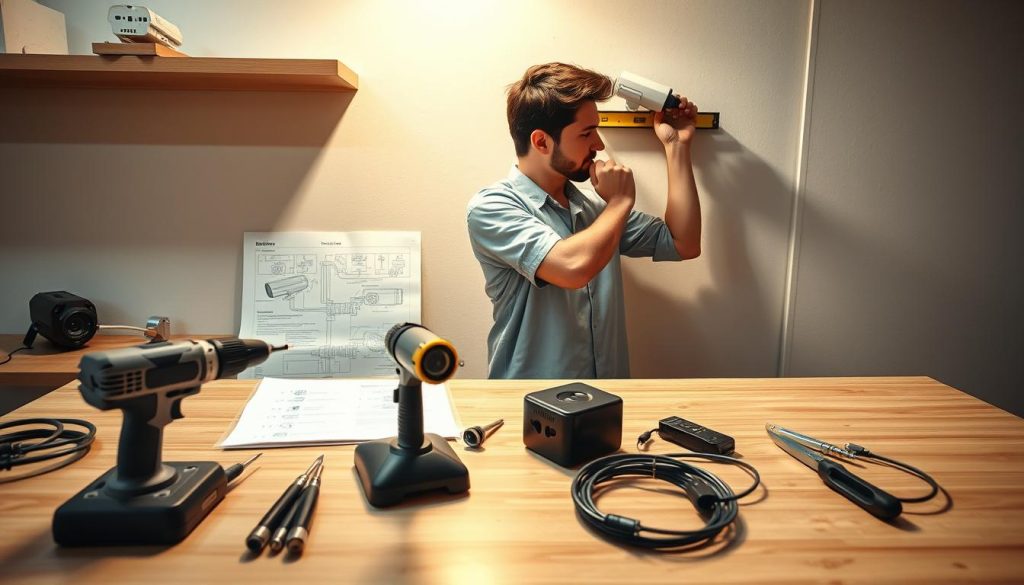
Strategic Planning: Mapping Out Camera Locations and Coverage
Before a single drill bit touches the wall, a detailed site plan determines the success of your security project. This pre-installation phase is arguably the most important step for an effective and legally sound surveillance network. Proper planning ensures your cctv cameras capture useful footage while respecting all privacy guidelines.
Identifying Critical Entry Points and Vulnerable Areas
Begin with a thorough security audit of your property. Walk around your home and identify every potential access point for an intruder. Primary entry points always come first.
These include the main door, back door, garage gates, and any ground-floor windows. Also, examine secondary areas like driveways, side alleys, and secluded backyards. These spots often lack natural surveillance.
The goal is to create a “defensible space.” Your cctv system should work in layers with other security measures. Covering all critical areas eliminates easy targets and deters unwanted activity effectively.
Optimizing Camera Angles for Maximum Field of View
Mounting height is crucial for balancing view width and detail capture. An ideal height is around nine feet, or 2.7 meters. This position provides a broad field of view while still capturing identifiable facial details.
It also keeps the camera out of easy reach for tampering. Angle each unit to minimize obstructions like tree branches or decorative items. Ensure the lens has a clear line of sight to the monitored area.
Pay close attention to lighting conditions. Avoid pointing a camera directly at a bright light source or a sun-facing windows.
Backlight and glare can wash out the video image, rendering even high-resolution cameras useless during key moments.
Test potential spots at different times of day. Check for shadows that might hide movement during the recording period.
Avoiding Common Placement Mistakes and Privacy Intrusions
Legal and ethical considerations are paramount during placement. Never point your security cameras into a neighbor’s private space. This includes their front door, windows, or backyard.
Such an action violates privacy and can lead to disputes under Singapore’s Community Disputes Resolution Act. For residents in hdb flats, this rule is especially critical for corridor-facing units.
Common tactical errors create security gaps. Placing cameras too high often creates blind spots directly beneath them. Corners and alcoves can be missed if the field of view is not checked.
For outdoor cctv installations, always use adequately weatherproof housings. Neglecting this leads to premature failure in Singapore’s humid climate. Also, verify night vision performance at each proposed location.
The best practice is to create a simple diagram of your property. Mark all proposed camera locations and draw their intended coverage zones. This visual plan helps spot overlaps, gaps, and potential privacy issues before any physical work begins.
This thoughtful approach ensures your cctv installation meets both your security needs and legal compliance requirements from the start.
Gathering Your DIY Toolkit: Essential Equipment for Installation
A professional-grade cctv installation begins long before mounting cameras, with the careful selection of essential tools and protective gear. Having the right equipment on hand prevents frustrating delays and ensures a clean, durable setup for your home security.
This checklist covers everything from basic hardware to specialized supplies. It helps owners execute a project that looks neat and functions reliably for years.
Hardware Tools: Drills, Screwdrivers, and Cable Testers
The core hardware forms the backbone of your project. A cordless power drill with masonry and wood bits is non-negotiable for creating secure mounting holes in walls.
A comprehensive screwdriver set handles various screw types on camera brackets and housings. A sturdy ladder provides safe access to high mounting points.
For wired cctv systems, specialized tools ensure proper connections. Wire strippers cleanly prepare cable ends. A fish tape helps route wires through walls or conduits.
A network cable tester is a smart investment. It verifies data and power connections are live before sealing everything up. This avoids troubleshooting a non-functional system after installation.
- Power Drill & Bits: For creating anchor holes in concrete, brick, or wood.
- Screwdriver Set: Phillips and flat-head drivers for assembling mounts.
- Ladder: A stable platform for reaching elevated areas.
- Fish Tape: Essential for pulling cables through tight spaces.
- Cable Tester: Confirms PoE and data lines work correctly.
Safety Gear and Cable Management Supplies
Personal protective equipment (PPE) is not optional. Safety goggles shield eyes from dust and debris when drilling. Heavy-duty gloves protect hands from sharp edges and cable wires.
When working at height, a hard hat provides crucial head protection. This management of risk is fundamental to a safe DIY project.
Cable management solutions protect wires and improve aesthetics. Use PVC conduits or trunking to route cables neatly along walls or ceilings.
Cable clips and ties secure loose wires. For outdoor runs, waterproof sealant ensures connections stay dry. Neat wiring prevents damage and makes future maintenance simpler.
Taking time to organize cables professionally enhances your property‘s appearance and the system‘s longevity.
Selecting Mounting Brackets and Protective Housings
The right mounting hardware ensures your cctv cameras stay in position and capture the intended area. Choose brackets that allow for precise angling adjustment during setup.
Common types include wall mounts, ceiling mounts, and pole mounts. Match the bracket to your specific surface and viewing needs.
For any outdoor cctv installation, protective housings are vital. Singapore’s humid and rainy climate demands robust weatherproofing.
Look for an IP (Ingress Protection) rating of at least IP66. This rating guarantees protection against heavy rain and dust. It keeps your cameras operational during intense storms.
For hdb flats with corridor setups, low-profile dome housings are often preferred. They offer a discreet appearance while still providing environmental protection.
Practical tip: Purchase mounting kits and housings from reliable brands available locally. Stores like HomeFix or online retailers carry suitable options for Singaporean property owners.
Having this complete toolkit ready streamlines the physical installation process. It is the best way to achieve a result that meets both your security needs and compliance with good practice guidelines.
Step-by-Step Guide to Mounting and Wiring Your Cameras
With your toolkit assembled and locations mapped, the hands-on phase of building your surveillance system begins. This is where your strategic plan becomes a physical reality. Executing this stage with care ensures a reliable, professional-looking cctv installation.
Pre-Drilling and Securing Camera Mounts
Begin by attaching each camera mount at its planned location. Use the mounting bracket as a template to mark drill holes on the wall or ceiling. This guarantees precise placement.
Select the correct drill bit for your wall material. For concrete or brick common in Singaporean property, a masonry bit is essential. For internal drywall or wood, a standard bit works.
Drill the holes to the required depth. Insert high-quality wall anchors for a rock-solid hold. These anchors prevent mounts from sagging or loosening over time, which is critical for consistent video coverage.
Screw the mounting bracket firmly into place using the provided hardware. Before attaching the camera unit, ensure the bracket allows for the final angle adjustment you need.
Running and Concealing Cables Neatly and Safely
For wired cctv systems, cable management is next. You will run either Siamese cable (for analog) or Ethernet cable (for PoE) from each camera back to the recorder.
Plan the cleanest route. Along skirting boards, inside cable conduits, or through false ceilings are excellent way to hide wires. Use cable clips or ties to secure them every few feet.
Safety is paramount. Before drilling through any wall, use a stud finder to check for electrical wires or pipes. This prevents dangerous shorts or costly damage.
For exterior passthroughs, always use a waterproof grommet. This seals the hole, keeping Singapore’s heavy rain and humidity from damaging your cables or entering your home.
Keeping cables organized and protected contributes directly to your system‘s longevity and your property‘s aesthetics.
Connecting Cameras to Power and the Central Recorder
The final step is making all electrical and data connections. For traditional cameras, connect the video and power cables to the labeled ports on your DVR or NVR.
Power over Ethernet (PoE) setups are simpler. Connect each camera‘s Ethernet cable directly to a PoE switch or injector. This single cable delivers both data and power.
Plug the central recorder into a power outlet and connect it to your home router using a network cable. This enables remote access and recording functions.
Power on the system and check each camera feed on the monitor. A “no signal” message usually indicates a loose cable connection or incorrect port assignment.
- Verify Power: Ensure each camera receives power (often indicated by an LED light).
- Check Recorder Inputs: Confirm each camera is connected to the correct channel on the DVR/NVR.
- Inspect Cables: Look for any visible damage or kinks in the cable runs.
Following this sequential process transforms your planning into a functional security network. A tidy installation not only looks professional but also ensures reliable footage from all critical entry points and areas.
Configuring Your System: Network Setup and Remote Access
The true power of a modern security setup is unlocked not by hardware alone, but through smart digital configuration. This phase transforms mounted cameras into an intelligent, remotely accessible surveillance network.
Proper software setup ensures you receive alerts and can view footage from anywhere. It also implements crucial data protection measures for your personal data.
Connecting Your DVR/NVR to Your Home Router
Begin by linking your recorder to your local network. Use an Ethernet cable to connect the DVR or NVR directly to your home router.
This physical link is the gateway for all remote access and smart features. Power on the system and navigate its on-screen menu.
Your first and most critical step is cybersecurity. Immediately change the default username and password to a unique, strong combination.
Leaving factory defaults is the most common way hackers gain unauthorized access to live video feeds, compromising your property‘s privacy.
Next, configure the network settings. Most modern cctv systems use DHCP to obtain an IP address automatically from your router.
Enable UPnP (Universal Plug and Play) in the recorder’s menu. This feature simplifies port forwarding, making remote connection setup much easier.
Setting Up Mobile App Alerts and Live Viewing
Remote monitoring hinges on your smartphone. Download the manufacturer’s official mobile application, such as Hik-Connect or Reolink.
Open the app and create a user account. You will then need to add your cctv system as a new device.
This typically involves scanning a QR code on the recorder or manually entering its unique device ID. The app will guide you through linking the device to your account.
Once linked, you should see live feeds from all your cameras within the app. Test the connection both on your home Wi-Fi and using your mobile data.
Successful viewing on cellular data confirms remote access is working. You can now check your property from anywhere in the world.
Configuring Recording Schedules and Motion Zones
Intelligent recording saves storage space and filters out irrelevant activity. Access the system‘s settings via the mobile app or desktop software.
Look for the motion detection menu. Here, you can draw custom motion zones on the video feed.
For example, draw a zone over your front gate or driveway. Exclude public areas like the sidewalk or a busy street.
This focus reduces false alarms from passing traffic. You can also adjust the sensitivity to ignore small animals.
Next, set a recording schedule. Most systems offer continuous, motion-only, or scheduled recording.
For optimal storage management, schedule recording only during high-risk periods, like overnight. This ensures footage is captured when most needed.
Finally, enable push notifications. You will receive instant alerts on your phone when motion is detected within your defined zones.
For added security, consider setting up email alerts with snapshot attachments. Some cctv systems also integrate with voice assistants like Google Home for hands-free status checks.
Following these guidelines ensures your installation is not just physically complete but digitally optimized. It meets modern needs for convenience and compliance with good personal data protection practices. For specific considerations in apartment living, our guide on condo CCTV installation provides further details.
Testing and Optimizing Your DIY CCTV System
The final step in your DIY security project is not about tools, but about precision testing and optimization. This phase confirms your installation works flawlessly in real-world conditions. Methodical checks now prevent frustration later and build full confidence in your security setup.
Think of this as a quality assurance audit for your entire cctv system. You will verify image clarity, motion detection accuracy, and remote access. A well-tuned system provides reliable footage and timely alerts.
Checking Camera Feeds and Image Quality Day and Night
Begin by viewing all camera feeds on your monitor and mobile app. Inspect each view for a clear, unobstructed line of sight. Look for proper focus and the absence of glare or lens flare.
Color reproduction should be accurate during daylight hours. Walk through the monitored areas yourself to see what the cameras capture. This reveals any blind spots or obstructions you missed during planning.

Night vision testing is a separate, vital step. Wait for total darkness and inspect the infrared-lit footage. Ensure critical zones like entry points and driveways are visible.
Check the effective range of the infrared LEDs. Objects at the edge of the property should not be pitch black. Poor night video often means cleaning the lens or adjusting the camera angle.
Fine-Tuning Motion Sensitivity to Avoid False Alarms
Next, calibrate the motion detection sensors. Walk through each camera‘s field of view to trigger an alert. Then, adjust the sensitivity settings in the app or recorder menu.
The goal is to detect human-sized movement while ignoring common nuisances. These include small animals, moving shadows from plants, or heavy rain. Most systems let you draw custom detection zones.
Focus these zones on high-traffic areas like gates and doors. Excluding public sidewalks or busy streets drastically reduces false alarms.
Fine-tuning is iterative. Test after each adjustment until the system alerts reliably for relevant activity. This optimization saves storage space and ensures you only review important recording events.
Ensuring Remote Access Works from Outside Your Home
The key feature of a modern system is remote monitoring. To verify it works, disconnect your phone from your home Wi-Fi. Use your mobile data plan to access the live feed via the app.
Successful viewing confirms remote access is properly configured. You should see all cameras with minimal video lag. Test push notifications for motion alerts while off your network.
If you encounter issues like failed login or a frozen stream, basic troubleshooting helps. Check your network bandwidth and ensure router port forwarding is correct. Sometimes, simply restarting the recorder and app solves the problem.
Introduce a “burn-in” monitoring period for the first few days. Watch the system closely to catch any intermittent issues. This final step ensures your DIY project delivers lasting security and peace of mind.
Avoiding Common DIY CCTV Installation Mistakes
Even the most carefully planned DIY security project can be undone by a handful of easily overlooked mistakes. This section highlights frequent pitfalls that compromise effectiveness and durability. Proactively avoiding these errors ensures your cctv system delivers reliable security and clear footage.
Learning from common oversights turns potential failures into a robust setup. It protects your investment and maintains good relations with neighbors.
Poor Camera Placement Leading to Blind Spots
Strategic placement is the cornerstone of effective surveillance. A frequent error is mounting cameras too high. This creates a wide view but misses crucial facial details near entry points.
Another misstep is pointing a lens toward direct sunlight or a bright windows. This backlight washes out the video image, rendering it useless during key daylight hours. Blind spots in corners or beneath a camera are easy for intruders to exploit.
The solution is thorough testing. Mount units at an ideal height of 8-10 feet. Verify the angle avoids glare and covers the entire target area. Walk through the scene to confirm no spots are hidden from view.
Inadequate Weatherproofing for Outdoor Cameras
Singapore’s tropical climate demands rigorous protection for exterior cctv installations. Using an indoor-rated camera outside guarantees quick failure. Humidity and heavy rain will seep into the electronics.
Neglecting to use waterproof junction boxes and seal cable entries is equally damaging. Moisture follows cables into connections, causing corrosion and short circuits. This exposes your entire system to premature damage.
An IP66 or higher weatherproof rating is non-negotiable for any device exposed to the elements. This compliance with environmental guidelines ensures long-term operation.
Always check the Ingress Protection (IP) rating before purchase. Proper sealing during installation is a simple step that prevents costly replacements.
Neglecting Software Updates and System Maintenance
Ongoing management is often forgotten after the physical setup. Failing to update cctv camera and recorder firmware is a major cybersecurity risk. These updates patch vulnerabilities that hackers could use to gain access.
Regular updates are a key part of personal data protection. They help secure your footage from unauthorized viewing. Dirty lenses also degrade video quality over time, making recording less useful.
A simple monthly wipe with a soft cloth maintains clarity. Review your storage capacity regularly. Insufficient planning leads to critical footage being overwritten too quickly.
- Update Firmware: Check for manufacturer updates quarterly to address security flaws.
- Clean Lenses: Remove dust and spider webs to ensure clear night vision and daytime images.
- Manage Storage: Adjust recording schedules and review retention settings to preserve important events.
- Tune Alerts: Fine-tune motion detection zones to reduce false alarms from passing traffic or pets.
Other oversights include poor cable management, creating trip hazards and connection issues. Legal missteps, like not informing neighbors about coverage edges, can also cause disputes.
For HDB flats with temporary town council approval, remember to renew or remove the installation when permission expires. A vigilant approach to maintenance keeps your home security functioning optimally for years.
Empowering Your Home Security with a Successful DIY Installation
Your new, self-installed surveillance system represents a major step forward in safeguarding your family and home. This achievement demonstrates that with careful planning and adherence to Singapore’s legal framework, homeowners can effectively take control of their property‘s safety.
The journey covered vital pillars: understanding home security needs, navigating regulations, selecting the right equipment, and meticulous execution. The tangible rewards are clear. You gain a significant deterrent, the convenience of remote monitoring, and substantial cost savings.
View your system as a foundation for an evolving security strategy. Responsible use, including respecting neighbor privacy and performing routine maintenance, ensures it remains a positive community addition.
Completing this DIY installation provides lasting peace of mind and the confidence that comes from proactive home security management.