
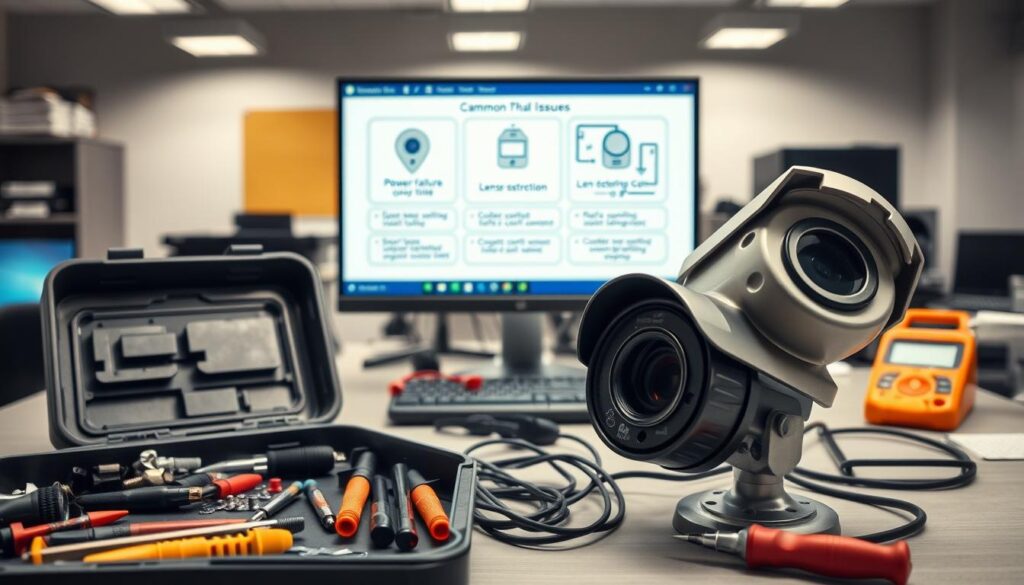
Discovering that your security system has failed can be alarming. This situation leaves your property vulnerable, especially in Singapore, where safety is a priority. Fortunately, most issues are not catastrophic. In fact, over 60% of failures stem from identifiable problems, such as power interruptions or loose connections.
This guide aims to provide you with a structured, step-by-step approach to diagnosing the reasons behind your security system’s failure. From basic power checks to advanced diagnostics, we cover it all. Regular maintenance is key to preventing unexpected issues, particularly in Singapore’s humid climate, which can accelerate wear and tear.
Many common problems can be resolved without professional help, saving you time and money. As you follow this guide, you’ll gain confidence in troubleshooting your system effectively. Let’s embark on this journey together to restore your peace of mind and ensure your security system is back in action.
Key Takeaways
- Security system failures can create immediate vulnerabilities.
- Most issues arise from power or connection problems.
- Systematic troubleshooting can effectively restore functionality.
- Regular maintenance is essential to prevent failures.
- Understanding your system helps in timely diagnostics.
- Many problems can be fixed without professional assistance.
Understanding Why CCTV Camera Suddenly Stopped Working
Realizing that your surveillance system is malfunctioning can be a source of distress. Property owners often feel a rush of urgency when they notice that their security cameras are not functioning as expected. The emotional response to this situation can range from concern about potential property loss to anxiety over compromised safety.
When it comes to identifying issues, it’s essential to recognize the most common symptoms of failure. Typical signs include:
- Black screens with no video signal
- Recording errors where footage is not saved
- Unresponsive feeds from the mobile app
- Night vision failures during low-light conditions
Understanding whether the issue is isolated to a single camera or affects the entire security system can significantly narrow down the cause. For instance, daytime failures might suggest problems with the power supply, while nighttime issues could indicate infrared LED malfunctions.
In Singapore’s tropical climate, unique challenges arise. Humidity can lead to corrosion, while thermal stress can impact electronic components. Therefore, it’s crucial to perform immediate visual checks. These checks can often save time and resolve simple issues before delving into complex diagnostics.
Many problems do not manifest as sudden failures. Instead, they can develop gradually, providing early warning signs. Recognizing these signs can prevent total system loss. A systematic approach to troubleshooting, based on the symptoms observed, is far more effective than random attempts to fix the issue.
As you prepare for the diagnostic journey ahead, remember that most failures have logical explanations and practical solutions. This understanding can help restore your peace of mind and ensure your security remains intact.
Performing Immediate Diagnostic Checks to Identify the Problem
A malfunctioning surveillance system can leave you feeling vulnerable. Fortunately, you can take immediate steps to identify the cause of the issue. Start with three critical inspections that can often resolve common problems without the need for professional help.
Checking Power Indicator Lights and Power Source
Begin by examining the power indicator lights on your security cameras. A steady green light typically indicates normal operation. However, blinking or red lights signal specific problems. If the light is off, it’s crucial to check the power sources right away.
Different brands, such as Hikvision, Dahua, and Reolink, may have unique LED patterns. Understanding these patterns can help you quickly identify the issue. If you see a blinking light, refer to your user manual for troubleshooting guidance.
Testing Alternate Power Outlets and Circuit Breakers
Next, verify the power source by testing the outlet with another device. Faulty wall sockets or tripped circuit breakers are common culprits behind power supply issues. In Singapore, homes often have dedicated circuit layouts that can affect specific camera locations.
To check the circuit breaker, look for any switches that may have been tripped. Reset them if necessary, and see if this resolves the issue. If the camera still doesn’t work, try plugging it into a different outlet.
Inspecting Visible Cables and Connectors for Damage or Corrosion
Finally, inspect all visible cables and connectors for physical damage, fraying, or signs of corrosion. In Singapore’s humid environment, moisture can lead to corrosion, particularly on BNC and RJ45 connectors. Look for greenish oxidation, which indicates moisture damage that requires immediate attention.
For minor cable damage, you can temporarily use electrical tape while planning for a permanent repair. Additionally, ensure that all connections are tight, as loose connections are a common cause of signal loss.
These immediate diagnostic checks can resolve over 45% of reported issues. Document any problems you find, as this information will be helpful if you need to seek professional assistance later.
Diagnosing Power Supply Failures as a Primary Cause
Power supply failures often lie at the heart of security system malfunctions. Understanding these issues is vital for restoring functionality to your surveillance setup. In Singapore, where power fluctuations average 12% annually, even minor dips can disrupt video feeds. This section will guide you through essential diagnostics.
Measuring Voltage at the Camera Endpoint
Start by using a multimeter to measure the voltage at the camera endpoint. Most security cameras require a steady input of either 12V or 24V DC, depending on the model. If the reading falls below 10.5V, the camera may shut down or behave erratically.
To measure the voltage:
- Set your multimeter to the DC voltage setting.
- Connect the probes to the power input terminals of the camera.
- Check the reading to ensure it meets the required specifications.
Battery Health and Surge Protection in Singapore’s Climate
For wireless models, battery health is crucial. Lithium batteries typically last 500+ charge cycles, while NiMH batteries only last about 300 cycles and are prone to memory effects. In Singapore’s humid climate, lithium batteries may last 2-3 years, making regular checks essential.
Additionally, invest in surge protectors with a minimum rating of 4kA. This is crucial for safeguarding your equipment against voltage spikes.
Addressing Circuit Breaker and Power Fluctuation Issues
Tripped circuit breakers are responsible for approximately 22% of system outages. Locate your electrical panel and check for any flagged breakers. Resetting these can often resolve issues.
If tripping persists, it may indicate underlying wiring problems that require professional inspection. Consider using eight-channel power distribution units, which can reduce failure rates by 30% compared to individual adapters.
In conclusion, diagnosing power supply issues is critical for maintaining the performance of your security system. If you encounter persistent problems, it may be time to consult a professional.
Resolving Connection Issues Affecting CCTV Camera Operation
Experiencing issues with your security setup can be both frustrating and concerning. Many problems arise from degraded physical connections, especially in Singapore’s humid climate. Regular inspection of these connections is essential to prevent signal loss and maintain clear video footage.
Nearly 60% of outdoor security device failures stem from these degraded connections. Signs of trouble often include snowy images or intermittent feeds, which can indicate failing BNC terminals. It’s crucial to check for greenish oxidation on copper contacts, a common sign of moisture damage that requires immediate attention.
Inspecting BNC and RJ45 Connector Integrity
Start by examining the integrity of BNC and RJ45 connectors. Tighten any loose connectors using a 10mm wrench. If you notice visible corrosion, it’s time to replace the connector rather than attempting a repair. This proactive approach can save you from more significant issues down the line.
Ethernet Cable Performance and Humidity Resistance
When selecting cables for your system, consider the type of Ethernet cable. Cat6 cables outperform Cat5e by providing 23% less signal attenuation over 100-meter runs, making them ideal for 4K surveillance systems. For installations in Singapore, opt for stranded copper conductors instead of copper-clad aluminum (CCA) for better humidity resistance and long-term reliability.
Weatherproofing and Protecting Outdoor Camera Connections
Weatherproofing is vital for outdoor installations. Apply silicone gel to RJ45 sockets and use compression-style BNC caps to prevent moisture ingress. Ensure your cameras have IP66-rated housings to withstand tropical downpours. However, even these housings leave ports vulnerable without additional protection.
During monsoon season, wrap vulnerable junctions with self-fusing rubber tape. This creates watertight seals while allowing for future maintenance access. For coastal areas, consider using Wen Hong’s marine-grade connectors, which feature ceramic-coated contacts that resist salt spray corrosion and withstand 98% humidity.
In conclusion, conducting annual inspections of all physical connections can catch early signs of environmental damage. This proactive maintenance helps ensure that your security system remains functional and reliable.
Fixing Network Connectivity Problems That Disrupt Surveillance
Network connectivity issues can significantly hinder the performance of your security system. These problems can lead to unexpected downtime, leaving your property vulnerable. In fact, over 22% of failures stem from mismatched IP settings or overloaded bandwidth. Addressing these issues promptly can restore your peace of mind.
Begin by confirming that your security cameras are accessible over the network. This involves a simple yet effective method: pinging the camera’s IP address. By opening the Command Prompt and typing ping [IP address], you can check the connection status. A successful reply indicates that the camera is reachable. However, if you encounter timeouts, this may suggest incorrect IP settings, a router firewall blocking the device, or physical cable damage.
Pinging Camera IP Address to Confirm Network Access
Using the ping command is a straightforward way to verify network access. If you receive a timeout response, it’s crucial to check your configuration settings. This can save you time and effort in diagnosing the issue.
Verifying Router Port Forwarding and IP Settings
Next, log into your router’s administration panel. Navigate to the Port Forwarding section to ensure that the HTTP port (80 or 8000) and RTSP port (554) are correctly configured. It’s essential that the external and internal IP addresses match, especially for systems like Hikvision and Dahua, which are commonly used in Singapore.
Also, check your router’s DHCP settings. Enabling “IP reservation” for each security camera can prevent address conflicts that lead to intermittent connectivity loss.
Resolving IP Conflicts and Optimizing WiFi Band Selection
When dealing with wireless setups, understanding the characteristics of different WiFi bands is vital. The 2.4GHz band offers wider coverage but slower speeds, while the 5GHz band reduces interference in densely populated areas. Choosing the right band can enhance the performance of your security cameras.
For multi-camera systems, consider the bandwidth allocation. High-definition video streams, especially 4K, require significantly more network capacity than standard 1080p feeds. This is where professional network audits can be beneficial. They help optimize channel selection and bandwidth allocation, ensuring consistent video streaming performance across all connected cameras.
In enterprise setups, VLAN segmentation can be a game-changer. By isolating surveillance traffic, you can prevent network congestion during peak usage hours. This strategy enhances the overall reliability of your security system.
Before making any changes, document your current network configuration settings. This allows for easy rollback if troubleshooting efforts introduce new connectivity problems. With these steps, you can effectively resolve network-related issues and ensure your security cameras operate smoothly.
Troubleshooting After a Power Outage: Restoring Camera Functionality
A sudden power disruption can leave your security devices vulnerable to failures. When electricity returns, many systems may remain offline due to surge damage or configuration issues. Understanding how to address these challenges is essential for restoring functionality.
Start by evaluating the condition of your surge protectors and uninterruptible power supplies (UPS). Metal-oxide varistors (MOVs) in protectors can degrade after absorbing multiple surges. Use a multimeter to check for continuity and visually inspect for burnt components. It’s advisable to replace these devices every 2-3 years, especially in Singapore’s humid climate, where moisture can accelerate wear.
Evaluating Surge Protectors and UPS Battery Condition
Surge protectors are vital for safeguarding your security system against voltage spikes. Discolored circuit boards often indicate failed protection. Gas-discharge models are more effective for handling Singapore’s characteristic voltage spikes during thunderstorms.
Uninterruptible power supplies can prevent up to 89% of outage-related failures when maintained properly. For setups with four cameras, a minimum runtime of 45 minutes is recommended, while eight-camera systems should aim for 90+ minutes. Remember to load test batteries annually to ensure reliability.
Inspecting Grounding Systems for Residual Damage Prevention
Proper earthing is crucial to prevent residual damage to sensitive surveillance equipment. Use a ground resistance tester to check readings, ensuring they are below 25 ohms. Test at multiple connection points, and consider installing copper grounding rods if necessary to improve earthing.
In conclusion, addressing power-related issues promptly can help restore your security system’s functionality. For professional assistance, consider certified electricians who specialize in security system power solutions, including whole-house surge protection installations starting at SGD 280. This proactive approach will help ensure your security cameras remain operational and effective.
Addressing Video Signal Interruptions and Recording Errors
Video signal interruptions can often lead to frustrating issues with your security system. Blurry or missing footage frequently traces back to signal transmission failures rather than hardware problems. When your monitor displays static or distorted images, the issue usually lies between the recording device and the display.
Nearly 35% of blank screen issues stem from incorrect input settings. Modern monitors with multiple HDMI or VGA ports may default to the wrong source after power cycles. To resolve this, verify your settings by matching DVR or NVR output ports to monitor input labels.
Next, cycle through all available inputs using the monitor menu. Ensure that your system is HDCP compliant, especially for 4K surveillance setups. This simple check can save you from unnecessary troubleshooting.
Checking Monitor Input Source and Sources of Video Flickering
For persistent video flickering, testing different refresh rates can help. A refresh rate of 60Hz works for most security monitors. If the flickering continues, consider other factors affecting the signal.
Testing Coaxial and HDMI/VGA Cable Functionality
Analog systems require intact cables to maintain signal integrity. Use an RF signal tester to measure:
- DC voltage (should read 12V±10%)
- Signal-to-noise ratio (minimum 36dB for clear video)
- Impedance consistency (75 ohms for BNC systems)
In Singapore, high humidity accelerates RG59 cable degradation. Physical damage to connections accounts for 18% of display failures. Examine ports for bent or missing pins in VGA connectors, loose HDMI retaining clips, and corrosion on gold-plated contacts.
Verifying HDD/SD Card Health and Recording Configuration
Hard drives degrade over time, especially in 24/7 recording environments. Check the S.M.A.R.T. status in your NVR settings for early warnings like reallocated sectors. For SD cards, run chkdsk scans monthly to fix file system errors.
Consider storage capacity planning as well. A 4TB drive lasts about 45 days for 1080p recording but only 12 days for 4K footage. Ensure that loop recording is enabled to guarantee continuous coverage. Prioritize retention policies for motion-triggered clips and set capacity alerts at 80% utilization.
For mission-critical systems, RAID 1 mirroring configurations provide redundancy, protecting against single-drive failures and ensuring continuous recording availability.
Updating Firmware and Resetting Cameras to Resolve Software Issues
In many cases, outdated software is the silent cause of failures in your security setup. When your security devices freeze, reboot randomly, or show compatibility errors, the system software often needs attention. Proper version management can prevent many of these issues.
According to the Singapore Security Technology Association, managing firmware versions can reduce problems by up to 72%. Manufacturers typically use three-digit codes, like v2.5.8, where each number indicates major updates, feature additions, and bug fixes. Mismatched versions between your devices can lead to feature lockouts, security gaps, and recording errors.
Understanding Firmware Version Compatibility
When updating, ensure that the firmware version is compatible with your devices. Mismatched firmware can cause significant issues, such as missing motion detection features or unpatched vulnerabilities. Always check your manufacturer’s guidelines for the correct version.
Safe Firmware Update Procedures for CCTV Systems
To perform a safe firmware update, follow these steps:
- Download the firmware to a local computer instead of updating directly over the air.
- Disable automatic reboots in the device settings to prevent interruptions.
- Use a UPS (Uninterruptible Power Supply) during the update, especially during thunderstorms common in Singapore.
Over-the-air updates have an 89% success rate, but manual updates are often safer for critical systems.
Performing Factory Resets to Restore Default Settings
If an update fails, performing a factory reset can help. This process will remove all custom settings and restore your device to its original state. For example:
- Dahua cameras require you to hold the reset button for 30 seconds during boot.
- Axis models need rapid power cycling three times.
- Hikvision devices may require TFTP recovery tools.
After a factory reset, you will need to re-enable features like motion detection and recording schedules.
To keep your system running smoothly, regularly check for firmware updates on your manufacturer’s website. Make sure to download the correct version to avoid disabling your cameras. Annual firmware audits can help ensure that all devices are up-to-date with the latest security patches and performance enhancements.
When to Contact Professional CCTV Services for Complex Issues
Recognizing when to seek expert help can be crucial for maintaining your security system. If you encounter persistent problems that resist basic troubleshooting, it’s time to call in professionals. Look for red flags like burning smells or water damage in camera housings, as these indicate serious issues.
In Singapore, licensed providers are essential for compliance. Wen Hong’s team offers rapid support, responding within four hours, which is faster than most local competitors. Be aware that unauthorized repairs can void warranties, especially for brands like Hikvision and Dahua.
Consider whether repair or replacement is more cost-effective. If your system is over eight years old or facing multiple issues, replacement might be wise. For a thorough assessment, contact Wen Hong at +65 60135960 for a free survey. Their expertise ensures reliable solutions and compliance with local regulations.